Many of my clients struggle to get decent results when taking social media photos.
Even with the latest iPhone, you will likely not get a great photo just by pressing the button. Sure you may get lucky with the perfect photo from time to time, but who wants to leave it to chance.
And it may be that you just don’t have the budget to hire a Sydney photographer.
So here’s a few simple tips to help you capture awesome images for your social media marketing without needing to take a course in photography.
1) Capture Candid Images of Your Team

Out of all the pictures you can take, you’ll find that images of people tend to get the most attention. Take advantage of this and grab your phone to take some pics of your staff interacting with each other and with customers. Or customers interacting with each other.
2) Show What Happens Behind the Scenes

Many of us fall into the trap of thinking what we do is boring. We think “why would anyone else want to see what I do”.
People are generally curious about what other people are doing. Like them or not, look at all the reality TV shows showing glimpses into other people’s lives. Many people can’t get enough of this.
You can offer a glimpse into your work place. Show your product being made, the inside of your building, the ingredients or materials you use. You get the idea. Your audience will find it more interesting than you think.
3) Clean Your Phone Lens
If your camera phone photos have ever turned out a little blurry or cloudy, one reason is the lens could be dirty. Our phones spend a lot of time in our pockets or bags and since the lenses don’t have a lens cap, they collect dust.
We also inadvertently put our fingers on the lens leaving behind finger prints and smudges.
Before you take your next photo, blow off the dust from the lens then use a soft cloth to give it a quick clean. That will clear up your photos.
4) Hold the Camera Straight
Not holding the camera straight is a very common mistake I see all the time. It’s super easy to correct too. I think a lot of people don’t really notice because they’re so focused on the subject that they forget to check the basics.
Next time you take a photo, take a few seconds before pressing the shutter release to check everything looks straight.
Example of a crooked photo:

This photo is straight.

5) Check the Lighting
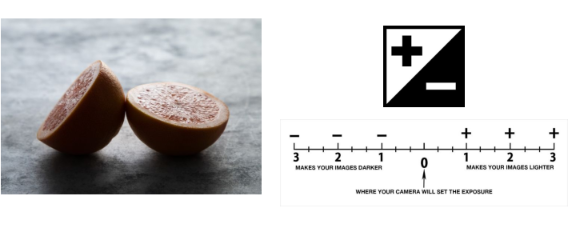
You may have taken photos only to find they are too dark, like in the example above. The easiest tip for non-professional photographers to fix this is to position the main light source, the sun or window, behind you if possible. Choose a different location or angle to take your photo from.
Some phones have an exposure correction function, which you can use too. This function allows you to lighten the image at the time of shooting. There’s usually a “brightness” icon or similar that you adjust as you compose.
But the easiest fix is to keep the brightest light behind you.